What is HTTPS?
HTTPS stands for HTTP Secure(or HTTP over TLS, SSL). The purpose is to establish a encrypted connection which provides more protection as opposed to HTTP that only creates transparent connections that are under the risk of being eavesdropping or intercepted by man-in-the-middle.
HTTPS differs from HTTP at some points -
- HTTPS uses port 443 as default, while HTTP uses port 80.
- HTTPS still uses HTTP as its essential communication method. You can take SSL/TLS as an “upgraded connection” as opposed to “normal connection” which HTTP uses with.
What is TLS/SSL?
SSL stands for Secure Sockets Layer, and TLS stands for Transport Layer Security. They are both cryptographic protocol making network communication more secure.
SSL is the predecessor to TLS. SSL was started by Netscape, and was upgraded to TLS in 1999 because Netscape was no more and thus no further maintenance from then on.
Today we still refer to TLS as SSL, because historically they are the same thing, only name changed.
How does it work?
Generally, TLS/SSL works with private key ,public key and certificate.
- Client and server have its own private keys. Public key is the same on both client and server.
- Certificate carries public key and other necessary informations.
- Certificate can exist on both client and server.
- Who sends certificate depends on method.
In order to use HTTPS, website owner should do the following:
- Generate Certificate Signing Request (CSR). By doing this, your computer will generate a private key.
- Go to a trusted third party Certificate Authority (CA), and validate with your CSR.
- When validation ends, CA will give you a new public key encrypted with CA’s private key.
- Install this CSR on your server machine.
Client and server establish connection by using a handshaking procedure:
tl;dr Version
In case you are impatient like me…
- Server sends server’s public key (certificate) to client.
- Client checks if it’s expired or not listed on the browser’s certificates authority list.
- If this certificate is trusted, client will send back its client’s public key to server.
- Server creates an unique hash and encrypts it with client’s public key and server’s private key and send it to client.
- Client decrypts the hash with client’s private key and server’s public key, and verifies it.
- Server and client start to communicate in cryptographic communication.
Basic TLS Handshaking
- First, client and server must agree on both using TLS/SSL protocol (HTTPS).
- Client sends a Client Hello message. In this step, client also sends informations like the highest TLS version it supports, cipher suites and suggest compression methods.
- Server responds with a Server Hello message, containing the chosen TLS version, a random number, the choices of cipher suites and compression method which client offered.
- Server sends a Certificate to client.
- Server sends a Server Key Exchange message to client.
- Server sends a Server Hello Done message to client.
- Client responds with Client Key Exchange, which may contains with PreMasterSecret, public key or nothing(depends on cipher suites choice).
- The client and server will now use random number and PreMasterSecret to generate a MasterSecret, which will be used by the following key data.
- Client sends a Change Cipher Spec message back to server. That means, “Everything I tell you now on will be authenticated.”
- Client sends a encrpted Finished message. Server will attempt to decrpt the Finished message. If it fails, the connection will torn down.
- Server sends a Change Cipher Spec message to client, telling “Everything I tell you now on will be authenticated.”
- Server will do the same thing like what client does in step 9.
Client-Authenticated TLS Handshaking
The procedure is mostly identical to basic TLS handshaking, but with some changes from step 4:
- Server sends its own Certificate to client.
- Server sends Server Key Exchange.
- Server requests client’s Certificate.
- Server sends Server Hello Done.
- Client responds with its Certificate.
- Client sends Client Key Exchange.
- Client sends a Certificate Verify message, which is a signature over the previous message using client’s private key. Later will be verified by server with client’s public key.
- After this step is identical to step 9 of basic TLS handshaking.
Cipher Suites
You may wonder what is cipher suites, right? Here’s what it defines:
- Key exchange algorithm - how client and server authenticate during connection.
- RSA, Diffie-Hellman, ECDH, SRP, PSK.
- Encryption algorithm - the method to encrypt message stream.
- RC4, Triple DES, AES, IDEA, DES…
- Message authentication code(MAC, some refer to hash) - the way to create a cryptographic hash.
- For TLS: HMAC-MD5, HMAC-SHA.
- For SSL: SHA, MD5, MD4, MD2….
Pros and Cons
Pros
- Security, security and security! No one will risk exposing their password, right?
Cons
- Complex handshaking means more bandwidth overhead.
- Since it costs more bandwidth, you may not want to use HTTPS on every page of your site, and by separating our protocol into two may lead more complexity to our system architecture.
Acquiring Certificates
Acquiring a valid certificate means you need to purchase it issued by 3rd party Certificate Authority.
There are tons of CA on the Web, and since this article is not about getting your best deal SSL certificate, I will use openssl to generate a self-signed certificate for the following demonstration, and remember self-signed certificate is for testing/development purpose. Don’t ever use it in production, or you will scare customers away.
Generate a Private Key
openssl req -nodes -new -x509 -keyout server.key -out server.cert
Here I use req command to generate a certificate and a private key under current directory.
By doing this, the following form will prompt out. Type whatever it requests, and remember to leave challenge password empty.
1 | Country Name (2 letter code) [AU]:TW |
HTTPS In Practice
Server
1 | var https = require("https"); |
Let’s proceed with Chrome…

Of course, our certificate is not issued by authorized 3rd party CA, and thus not trusted.
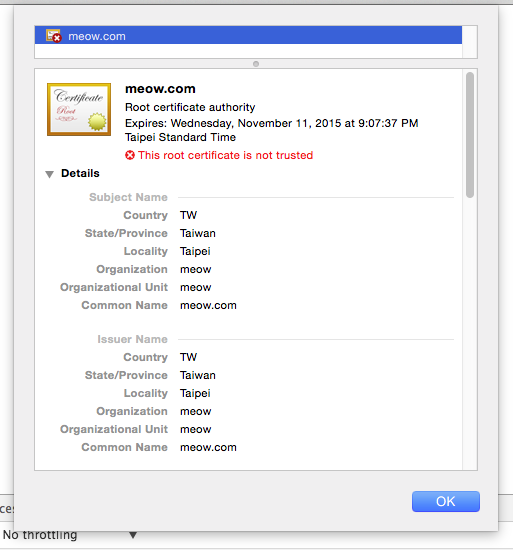
At least, it works with our Node.js, yay~
References
- https on wikipedia(https on wikipedia)
- TLS on wikipedia(TLS on wikipedia)
- Public-key cryptography(Public-key cryptography)
- https and certification for dummies on Stackoverflow(https and certification for dummies on Stackoverflow)
- The First Few Milliseconds of an HTTPS Connection(The First Few Milliseconds of an HTTPS Connection)
- How SSL Works(How SSL Works)
- Creating a Self-Signed SSL Certificate(Creating a Self-Signed SSL Certificate)
- How SSL works tutorial - with HTTPS example(How SSL works tutorial - with HTTPS example)
- What is HTTPS?(What is HTTPS?)
- Is it possible to generate RSA key without pass phrase?(Is it possible to generate RSA key without pass phrase?)